
Hello guys and welcome to my first Photoshop tutorial !
Ever wanted to create a logo for your signature or website? Now you can learn the basics of creating a logo by following this simple Photoshop tutorial and if you add some other geometric shapes you can achieve different and why not better results.
In this tutorial we will learn how to create a cool looking logo just by using the Ellipse Tool and some Blending Options. If you follow this tutorial correctly you will get something similar to this:

Step 1 - Creating a new file:
So the first step will be to open Photoshop and create a new 1024x768 pixels document with a black background.

Step 2 - The first Ellipse:
Select the Ellipse Tool from the left side bar, make sure the Fill Pixels button (3rd button from the top) is selected, hold down the Shift Key and drag a perfect circle like in the image below:

Step 3 - Modifying the first Ellipse:
Right click the layer that has the Ellipse in it and select Blending Options. Inside Outer Glow make sure that you select a light blueish color (#c8ebf7) and modify the Size to 73 pixels.

 Step 4 - Duplicating the Ellipse:
Press CTRL+J to duplicate the FIRST LAYER with your first Ellipse and then with the SECOND LAYER selected press CTRL+T to transform the circle. With the SHIFT+ALT key pressed drag one of the corners inside to make the second circle smaller than our previous one, when you are done press ENTER. You should end with something like this:

Step 5 - Modifying the second Ellipse:
With the second layer selected right click on it and press Clear Layer Style.

Inner Shadow Distance to 5, Choke to 0, Size to 21.

Inner Glow color to a light blue (it's up to you) and Size to 68.
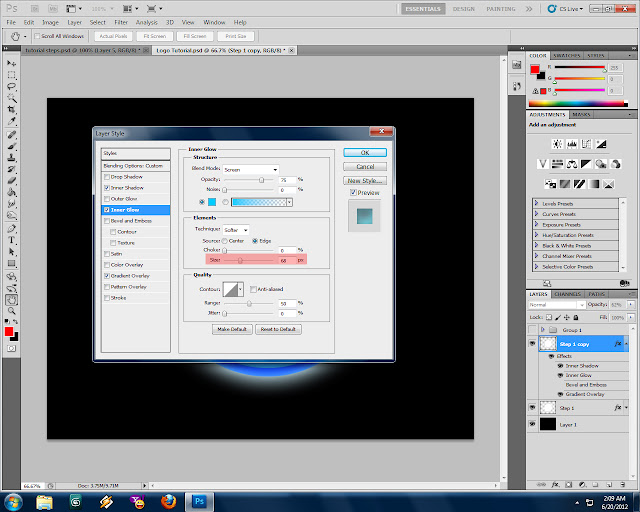
And Gradient Overlay's first color to #4dd8f6 and then hit OK.

Step 6 - Creating another inner circle:
Just like we did before when we created the second ellipse we need to create another one. Press CTRL+J with the second Ellipse selected to duplicate it, then CTRL+T to enter Transform, hold down SHIFT+ALT while dragging inside the center to make it smaller, then hit Enter to confirm. You should get something like this:

Right click the third layer then select Blending Options. Inside Inner Shadow Modify we have the same values as our second layer, so don't modify anything.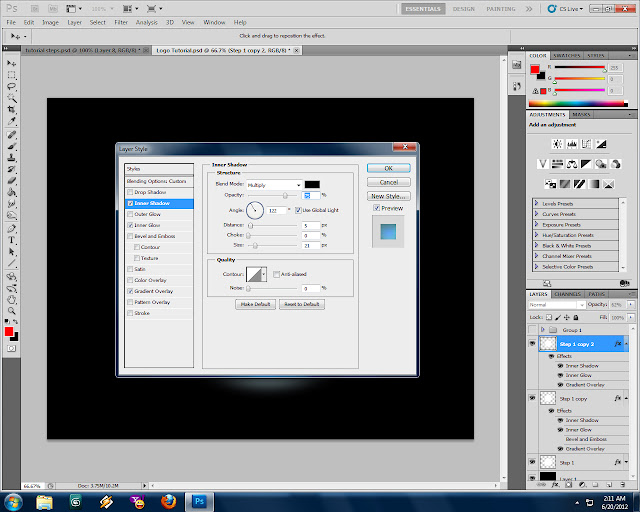

Inside Inner Glow select a cyan color and modify the size to 68.

Inside Gradient Overlay make the first color #455fff then press on the middle to add a new color marker and change it's color to #1182f5 and make the last color pure black.

Create a new Layer, then select the Ellipse Tool and create a small circle just like in the image:


Now right click one of the sides layer (doesn't matter which one) and go to Blending Options.
Inside Outer Glow select a cyan color and modify the size to 68.


Go select the Horizontal Type Tool from the side bar (the T icon) and add a text with a font and size that you like inside our center area and change the Layer Style to Overlay:

The logo design is over but it looks a bit dark, so we need to add some glow to it. To do that create a new layer, select the Brush Tool with a Soft Brush having a decent size of 100 px at least and start drawing an outline of the logo just like below:


Our logo is almost done but I decided to add a Color Balance adjustment layer to change the colors a bit. To do that go to the top menu, Layer - New Adjustment Layer or select the 4th icon from the bottom Layer Pallete and add a COLOR BALANCE then modify the settings as you want or use mine:


And that's it, we're done with the tutorial but don't forget to try and experiment with different geometric shapes to achieve different results. Most of the time I prefer a circle because it's easier to add centered text to it but depending on your needs you can use even custom shapes to create what you're looking for.
I hope you learned something new from this tutorial. Free feel to comment or ask any questions if you get stuck by posting comments below:
See you next time !