

This tutorial is really easy to follow as it covers a few simple steps. Make sure that you check the images under each step for a better understanding. So let's get started.
Step 1: First we need to assign the mental ray renderer in the Render Setup. Press F10 on your keyboard to bring up Render Setup, scroll down to Assign Renderer and choose Mental Ray Renderer.

Step 2: Inside 3Ds MAX user interface go to Rendering menu and pick Environment (the shortcut for the Environment tab is 8).

Step 3: Inside the Environment tab click the None box after Environment Map and select a Bitmap from the materials list.

Step 4: Your browse dialog will pop-up, asking you to select an image as your background. I used an old paper as my background (which you can download by clicking here). Select your Bitmap and then hit Open.

Step 5: Now go to Views menu - Viewport background - Viewport background... (as you can see the hotkey is Alb+B).

Step 6: Inside Viewport Background dialog thick Use Environment Background's case, enable Display Background and pick your Perspective viewport, then hit OK. Enabling this options will display your background (old_paper.jpg) inisde the Perspective Viewport.

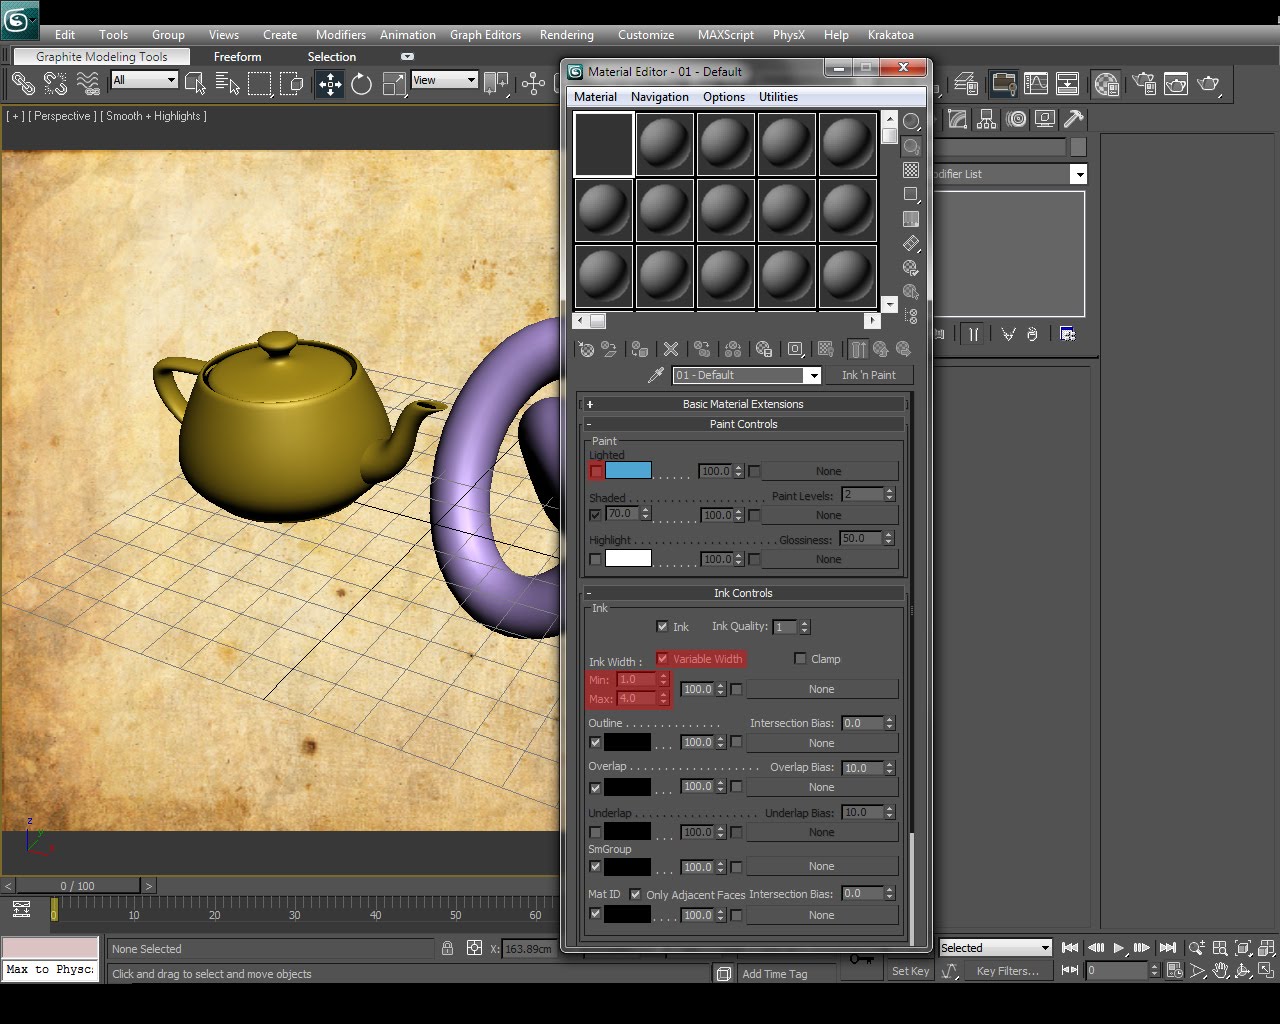
Step 7: Create or import any 3D objects in your scene that you would like to turn into a sketch. For this tutorial I've used a Teapot with 10 segments and a Torus Knot.

Step 8: Press M on your keyboard to open Material Editor, click on the Standard box and select Ink & Paint from the list then click OK.

Step 9: Inside Ink & Paint material disable Lighted because we want only the outline of our 3d objects, then enable Variable Width and set the Min value to 1 and the Max value to 4 (this will create different widths for our outlines.)
Step 10: If we take a render now (Shift+Q for Quickrender inside your viewport) we'll see that our outline looks very clean but our paper is old, so these two don't really fit together. In order to make our lines look "dirty" we'll have to add a Noise map inside the Ink Controls, next to variable width options (click the None box and select Noise from the list).

Step 11:Inside the Noise map change the Noise Type to Fractal and the size to 2, then press the Go to Parrent button to return to the Ink&Paint material.

Step 11: Now we need to apply the Ink & Paint material to our objects to turn them into sketches. Select your objects from the scene and inside Ink & Paint material click Assign Material to selection button.

Step 11 - render: Now if we take a render (hotkey - Shift + Q) we'll see that our sketch has line gaps, this happens because the Overlap Bias is too high for our geometry (it depends on your objects)

Step 12: In order to fix this problem we'll have to lower the Overlap Bias inside Ink & Paint. Open Material Editor (hotkey M) and under Ink Controls roll-out change the Overlap Bias to 2.

Final Step: Render your scene and see the result. You should have something simliar with the image below.

If you want to add color to your sketches make sure that you enable Lighted case inside the Paint Controls.

With this technique you can create sketches from every object that you want. You can use any other backgrounds to achieve different results (to change the background press 8 and click on the Envrionment Map, then pick any other image that you like).
I hope you enjoyed this tutorial. If you have any question about it please post it in the comment section. Thanks for watching! I'll see you next time with another tutorial.