Category: Design
In this tutorial we will talk about creating some unique badges inside PS.
Here are some examples that I did:
We will be focusing on creating this kind of badge, but it's really similar to the ones you've seen above, so don't worry.
Step 1: So start creating a new document (the size is up to you, I used 1366x768 for the project).
Step 2: Fill your Background layer with Black.
Step 3: Create a new Layer on Top of our Background layer and drag with the elipse tool by holding Shift a perfect circle. I use all shape Tools with Fill Pixels selected. The circle should be white colored when you create it so you can see how big it is but then make sure you invert it (Ctrl + I inside the circle layer to switch from pure white to pure black). So in the end you should have a black circle on a black background on short.
Step 4: Right click the Circle Layer and go to Blending Options. This is where the magic happens.
I used the following settings for creating this kind of badge, but you can try and experiment with your own:
You should end up with something like this:
Step 5: Next create a smaller circle on top of the previous one and place it inside the bigger circle (try to use rulers - CTRL+R - it might help you to position it properly). Then right click the first circle layer and go to Copy Layer Style, next right click the smaller one and go to Paste Layer Style. In the end you should have something like this:
Step 6 (Optional): Duplicate the main circle layer once and then right click it and clear the layer style. Make sure only your bigger circle with layer styles applied is visible and the white one on top. Now we will use CTRL+click to make a selection of the white circle , make sure you're in the selection tool on the left bar (Eliptical Marquee Tool or whatever) and move only the selection to the top then hit delete on your keyboard (make sure you're in the white circle layer not in the main one). You should get this kind of shape for the white circle.
Change the layer style to Overlay and lower the opacity as you desire. This will make things look shinier.
I also did the same for the inner circle but this time I ended up with 2 layers instead of one:
And this is how they look after being changed to Overlay:
Step 7: Create a small circle inside of the 2 previous ones and place the layer on top. Paste the same layer style as circle 1 and circle 2 but make sure to modify the Blending Options to make it look darker:
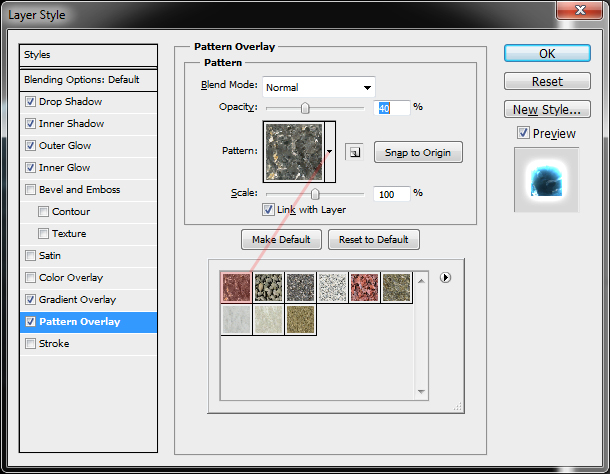
Step 8: Create another circle by using the elipse tool and this time use Light Marble Preset as Pattern Overlay to make the circle brighter:
Step 9: Create a triangle with the Polygon Tool (next to the Elipse Tool , Rectangle Tool, etc) by changing the Sides to 3. Make sure the triangle is white and then go to Blending Options and inside the Outer Glow change the style to Color Dodge, increase the size a bit and maybe lower the Opacity to get something like this:
Our main shape is done. Next we will focus on adding some extra objects under the badge. I created this triangular shape and duplicate it once. Apply the similar kind of layer styles but without the patterns.
Then by using the same technique we used in Step 6 and by duplicating the layers you can achieve something similar to a wing:
Next by using the Pen Tool I drew some ribbon shapes and filled them with white, then I changed the Blending Options - Inner Glow settings and the Color Overlay to Red.
I also added a Brightness & Contrast layer on top of all layers and played with the contrast values a bit. And here is the final result:


