Time required to complete: < 5 minutes
Hello guys and welcome to another 3Ds MAX Tutorial. Today we will learn how to create some awesome looking grass inside 3Ds MAX with the help of Hair and Fur Modifier. This is a step by step tutorial with images so if you ever get stuck make sure to check the image under each step for a better understanding of the process. If you follow this tutorial you will get similar results to these:
Great, so let's get started !
We will need some textures to complete this tutorial, 2 for our grass and 1 for our ground.
Download the following images by clicking the thumbnails and saving them on your computer:
 |
| Yellow Leaf texture |
 |
| Green Leaf Texture |
 | |
| Ground Texture |
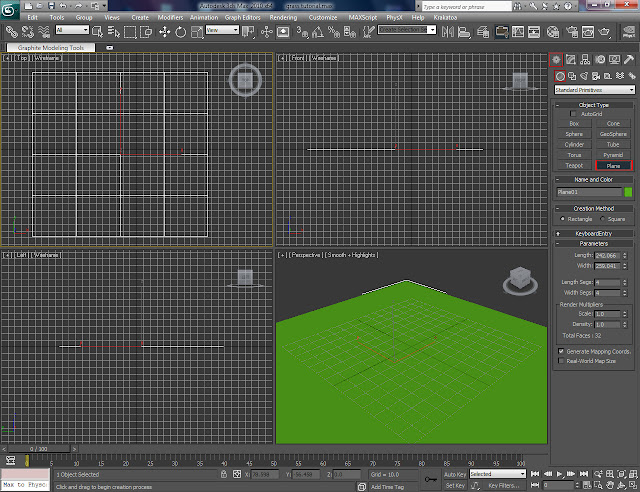
Step 1: Open 3Ds MAX and create a Plane in the Top View:
Step 2: With the plane selected go to the Modify Tab and change the following:
Length : 600
Width: 600
Length Segs: 12
Width Segs: 12
Step 3: From the Modifier List apply a Noise modifier on top and change the following:
Scale: 130
Enable Fractal
Z Strength: 40
Step 4: From the Modifier List apply a Turbosmooth modifier on top to smooth the geometry a bit:
Step 5: Now from the Modifier List apply a Hair and Fur (WSM) and change the following:
Hair Count: 35000
Scale: 35
Root Thick: 9
Tip Thick: 1
Tip Color: Assign a bitmap and choose yellow_leaf.jpg
Root Color: Assign a bitmap and choose green_leaf.jpg
Specular: 30
Glossiness: 97
Step 6: Now we need to assign the Ground material to the plane. To do that press M onto your keyboard to bring up the Material Editor. Inside a Standard material click onto the Diffuse Box and assign a Bitmap then choose Ground.jpg as the bitmap image. Increase Specular to 20, Glossiness to 16 then make sure the plane is selected and press on Assign Material to Selection (number 3 in image) and then to preview it press on Show Map in Viewport (number 4 in image):
Step 7: If you do a test render you can see that the grass does not produce any shadows at all. To make everything look better create a Target Spot Light from Create > Lights > Standard > Target Spot and place it above our plane like in the image:
Then from the Modify tab change enable Shadows and choose Ray Traced Shadows from the list and increase the Multiplier to 2.5.
And that's all you can now render your grass !
If you save your image as a PNG you can then edit it in Photoshop, add a sky, Sunlight, glare and lens effects and achieve results like this:
Thanks for watching! Hope this tutorial helped.
If you still have any questions please use the comment section below. See you next time with another tutorial.


