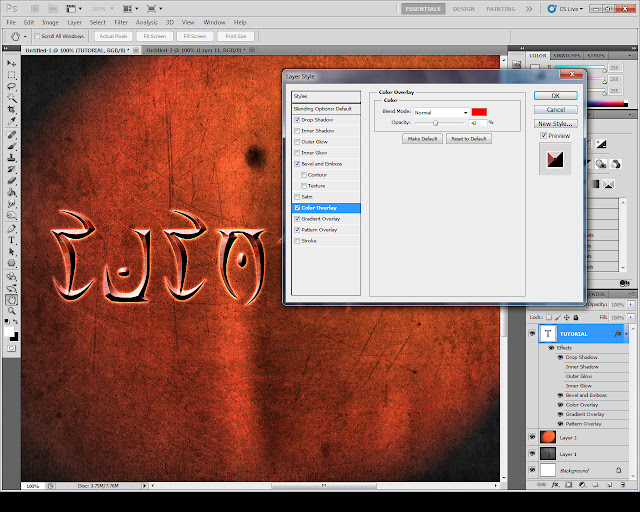
Today I will show you how to create some awesome elven runes effect with some simple methods that cover Layer Styles, Patterns, and some Lightning Effects. You can use this result to add that magic look to a signature or to create a great wallpaper for your desktop. So if you follow this tutorial correctly you can achieve something like the result below and the best part is that you can change the text whenever you want to and the whole effects would add to the text instantly.
The first thing you'll need to do is to download the font that we'll be using for this tutorial. The font is called Daedra and you can download it by clicking on this link: http://www.dafont.com/daedra.font
just press the Download button on the top right, wait for the font to download then extract it and place the font into Windows > Fonts and it will install right away even if Photoshop is already opened.
Now that we have the font we will need to have a background and a rusty texture for our text.
Download the following images because we will need them for this tutorial to be our background and our pattern for the text.
1. Now open Adobe Photoshop and create a new image, the size it's really up to you. But if you want to follow this tutorial really close just enter up my screen values which are 1280x1024.
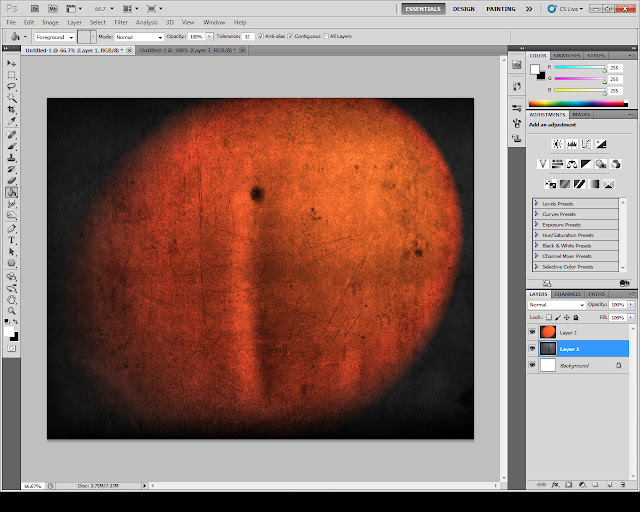
2. Next open the old_paper.jpeg and add it into a new layer just like in the image below (scale it down if necessary).
3. Press SHIFT+CTRL+U to desaturate the image. You should end up with something like this:
4. Press CTRL+L to bring up the Levels menu and drag the midpoint to the right and the last point a bit to the left to bring some contrast into our image:
5. Now create a new layer, add it on top and fill it with white:
6. Next with our new Layer selected go to Filter > Render > Lightning Effects.
7. Inside Lightning Effects move the Ellipse inside the Preview window to add some lightning coming from the top right and then choose a red color for the Light by pressing the color box which is white by default. Check the image below:
8. Now change this Lightning Effects Layer to Overlay and you should end up with something like this:
9. Next open the rust_texture.jpg and then go to Edit > Define Pattern and give the pattern a name. You can then close the rust_texture document.
10. Now with the Horizontal Type Tool add a text having a decent size and then change it's font to Daedra (the one which we downloaded from Dafont)
11. Next we only need to change the text's style to achieve the final result. To do that select the text layer, right click it and go to Blending Options...
Inside Blending Options modify the following:
Drop Shadow:
Bevel and Emboss:
Color Overlay:
 Gradient Overlay:
 And inside the Pattern Overlay choose our rust texture from the Pattern list and lower it's opacity a bit:
Final result:
You can the to use the same effect with other fonts as well but make sure to modify the Bevel and Emboss according to your font size and thickness. Also our Drop Shadow is dependent on the background because it is set to Color Burn so whatever you put under the text has a great impact on your result. Feel free to comment or ask any questions about this tutorial into the comment section below, also I would be very excited to see your results so if you have followed this tutorial you can upload your result and post a link to the image into the comment section below this tutorial.
See you next time!


