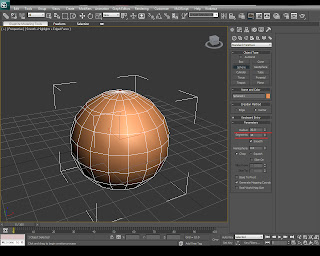
Step 1: Create a Sphere in the Perspective view. (Radius: 30, Segments: 18).
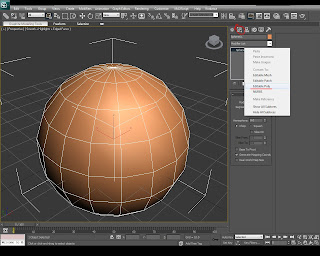
Step 2: Now right click on the Sphere in the Modify panel and convert it into an Editable Poly.
Step 3: Into the Editable Poly selection choose polygons
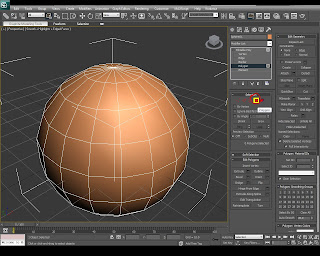
Step 4: Start selecting random faces on the Sphere. Avoid selecting polygons from the top or bottom of the sphere (leave at least 2 unselected rows like in the image below).
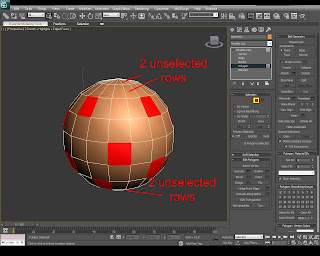
Step 5: With the polygons still selected click on Bevel settings and apply 2 for Height and -1 for the Outline Amount.
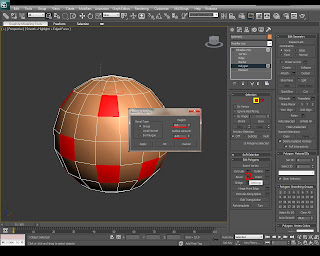
Step 6: We'll need to apply another bevel. Click on Apply then change the settings as following: 50 for Height and -2.5 for Outline Amount. Click OK. You'll need to have something very similar with the picture below
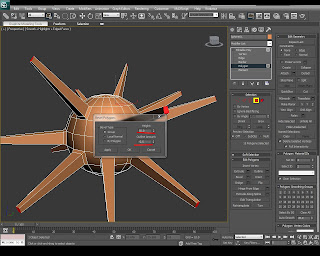
Step 7: From the Modify pannel rollout choose Turbosmooth. And in the Turbosmooth modifier apply a 2 Iteration value.
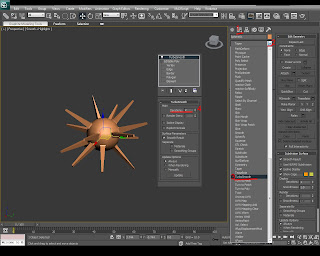
Step 8: After applying the Turbosmooth we need to apply a Noise modifier on top. From the Modify pannel scroll down to Noise and apply the values as shown in the image. (80 scale, X,Y,Z - 55)
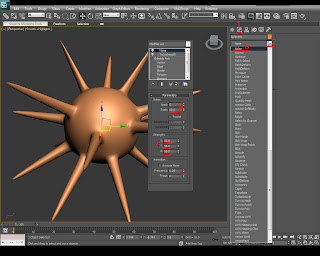
Step 9: Press F10 on your keyboard to bring up the Render Setup. In the Common tab scroll down to Assign Renderer, click on the small case after Production and pick Mental Ray Renderer.
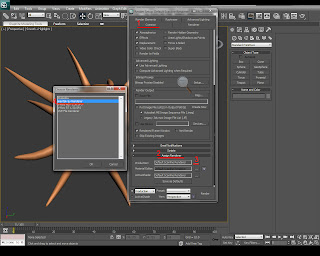
Step 10: Now press M on your keyboard to bring up the Material Editor. Click on Standard button as shown in the image and pick Arch & Design (mi).
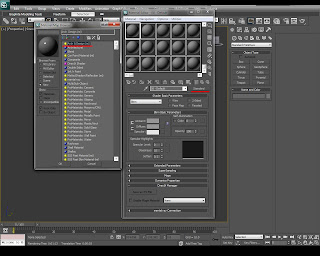
Step 11: In Arch & Design material click on the diffuse box and select a Falloff map.
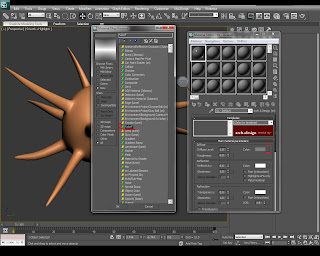
Step 12: In the Falloff map click on the second color (white as default) and change it to a blue color (or any other color that you want the virus to be) and then click Go to Parent (nr. 3 in the image) to go back to the main material.
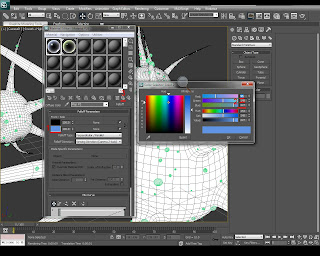
Step 13: In the main material (Arch & Design) change Reflectivity to 0.5, Glossiness to 0.5, scroll down to Self Illumination (Glow) thick Self Illumination (Glow) case and next to Filter there is a box, apply a Falloff map to it and leave it as default (black & white). Go to the main material again and scroll down to Special Purpose Maps and apply a Noise map into the Bump. See the pictures for a clear understanding.
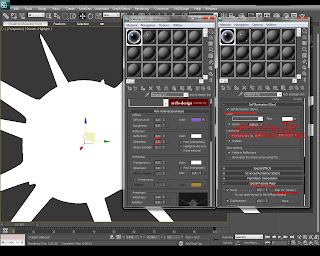
Step 14: The Noise map that we applied into the Bump channel needs to be modified. Change the Noise Type to Fractal, the Size to 1.8 and the levels to 10.
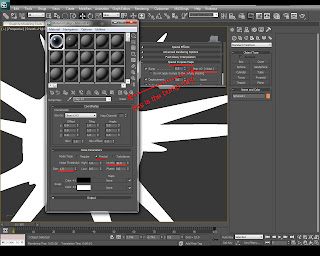
Step 15: Select the virus in the viewport and click Assign Material to Selection in Arch & Design material.
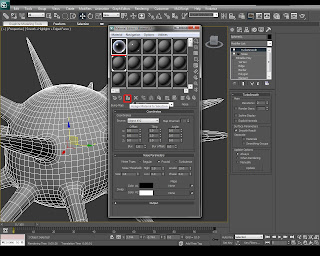
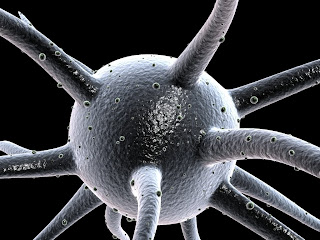
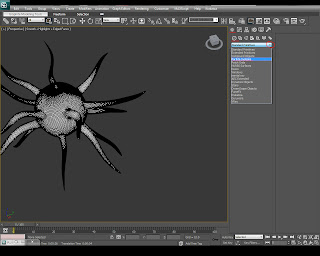
Step 16: Now the virus is basically finished but I found it a little simple so I decided to add small "alien cells" to cover it. To do that click on the Create Panel, select the arrow next to Standard Primitives and scroll down to Particle Systems.
Step 17: In Particle Systems click on PF Source and drag a rectangle in the perspective viewport, then click on particle view (or press 6 on your keyboard to bring particle view up).
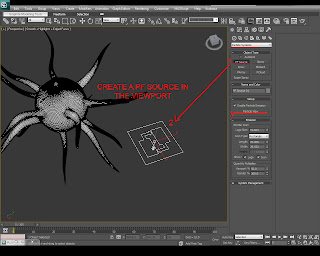 .
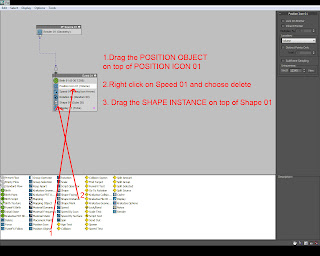
.Step 18: If you never worked with particles before this might look complicated but in fact it's not. This is a diagram which controls all the particles born on PF Source 01. We need to change a few things to make the small cells appear on the surface of the virus. Drag a Position Object operator on top of The Position Icon (a red line must appear when you drag it on top of it), then right click on Speed 01 and choose Delete (we don't need the particles to move at all), and drag a Shape Instance operator on top of Shape 01. Check the image for more details.
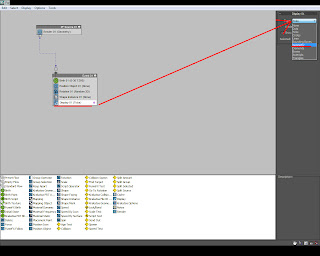
Step 19: Click on Display 01 event and choose Geometry from the list.
Step 20: Now create a sphere with a radius of 7 and 32 Segments in the perspective viewport and scale it down on the Z axis to make it look like an oval shape.
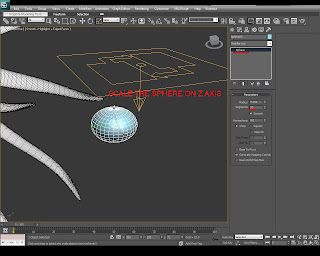
Step 21: Now select the PF source 01 and go back to particle view (6 is the shortcut). In the Position Object operator choose Emitter Object By List and pick Sphere 01 (which is the virus).
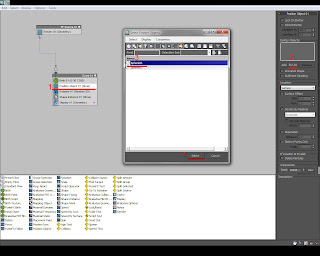
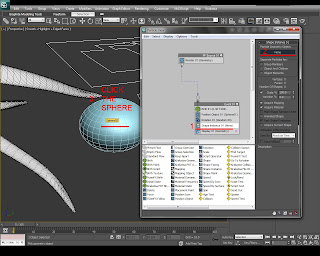
Step 22: Next, go to the Shape Instance and click on the None box under Particle Geometry Object and select the Sphere 02. (the smaller one).
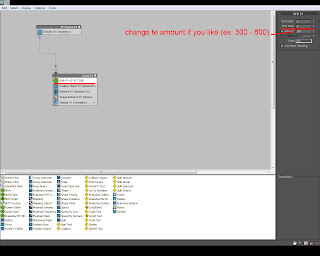
Step 23: Select Birth 01 event and change the emit stop to 0 so that all particles will be born in the first frame. Eventually you can change the number of particles if you like too.
Step 24: Now in Shape Instance operator change the Scale percent to about 20 and the Variation percent to 65. This will give the "alien cells" a smaller scale and a bit of randomness.
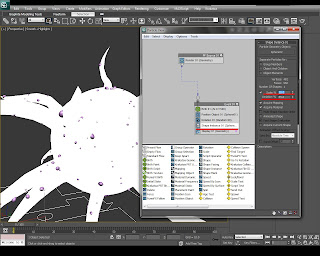
Step 25: The last thing that we'll need to do is to apply a material to the particles. To do that select Material Static operator and drag it under Render 01, then click on None button and assign a Arch & Design (mi) to it.
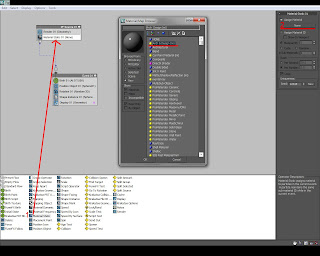
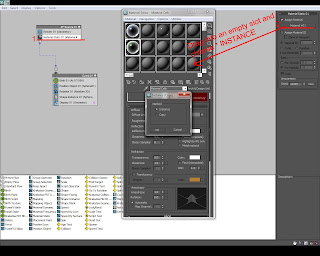
Step 26: Now press M to bring up the Material Editor and drag the material from the Particle View Material Static 01 operator into a new slot into the editor. Use the same techniques we used before in steps 11-14 to create a similar material but choose a different color in the Difuse Falloff map. (The diffuse map needs to be a Falloff with Black & Green or Red any color that you like, change the Reflectivity and Glossiness to 0.5 the Self Illumination glow needs to be activated and you must apply a Falloff map to the filter and also pick a noise map for the bump).
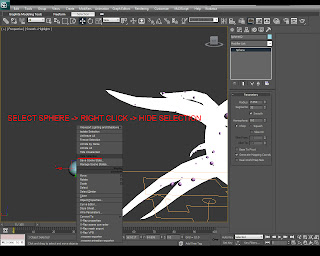
Step 27: Close the Particle View and go to the perspective Viewport, select Sphere 02, hit right click and hide it.
Step 28: Orbit around the virus and choose an angle which you like the most, then press Ctrl+C on your keyboard to create a Camera from the perspective view. Next press Shit+Q on your keyboard to quick render the camera view. Then wait for the render to finish and after it's done, you can save the image by clicking on the Save Image button on top left.
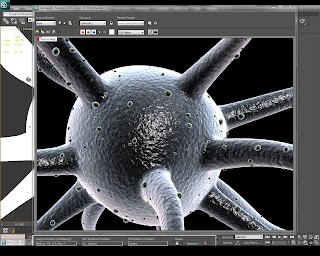
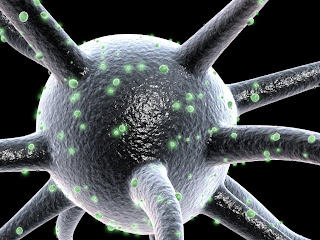
If you wish to edit your final render in Photoshop save it as a .PNG because you'll have a transparent background. I didn't change the background in my example but I've added a glow to the "alien cells":
This was my first tutorial. I hope you enjoyed it and if you have any questions please post them in the comment section. Thanks for watching ! I'll post new tutorials soon.
